How to Install Screw Piles: A Complete Guide for Homeowners
- DownForce Piling
- Oct 2, 2025
- 11 min read
Updated: 4 hours ago
Introduction
Planning a new deck, shed, or backyard project? A solid foundation is the first step. Traditional concrete footings take time to cure, depend on good weather, and often involve messy excavation. That’s where screw piles come in.
Also known as helical piles, screw piles are steel posts with spiral-shaped plates that twist into the ground like a giant screw. They provide immediate load-bearing strength and can be installed in almost any soil or season.
In this detailed guide, you’ll learn how to install screw piles at home, the tools you’ll need, mistakes to avoid, and when it’s smarter to hire a professional installer like Down Force Piling in Alberta.
What Are Screw Piles?
Screw piles are long steel shafts with helical plates welded near the bottom. When rotated into the ground, the plates act like threads, anchoring the pile firmly into stable soil.
Key benefits of screw piles:
Immediate load capacity (no waiting for concrete to cure).
Installable year-round, even in frozen ground.
Minimal ground disturbance compared to digging.
Long-lasting — galvanized piles resist corrosion for 50+ years.
They’re widely used in commercial and industrial construction, but are also perfect for homeowner projects like:
Fences and gates
Garden sheds
Small additions
Boardwalks or walkways
Tools and Materials Needed
Before you begin, make sure you have the right tools and safety gear.
Materials:
Screw piles (2⅜”–3½” diameter for light projects; larger for heavier loads)
Brackets or caps (to attach beams, posts, or framing)
Tools:
Manual installation wrench or T-handle (for small piles)
Hydraulic driver (available for rent; best for multiple or deeper piles)
Socket adapters or drive heads (to fit the pile shaft)
Level and measuring tape
Cutting tool (angle grinder or saw) for trimming pile height
Marker or stakes to mark layout
Safety Gear:
Steel-toe boots
Gloves
Safety glasses
Ear protection (if using hydraulic equipment)
Step-by-Step: How to Install Screw Piles
Step 1: Plan Your Layout
Measure and mark the exact spots where your piles will go.
For decks, this means marking under each post location.
Keep spacing even for proper load distribution (often 6–8 feet apart for deck beams).
Step 2: Choose the Right Pile Size
Light loads (fences, small sheds): 2⅜”–3” diameter.
Medium loads (decks, pergolas): 3½”–4” diameter.
Heavy loads (additions, garages): 4”+ diameter or multiple piles per footing.
Tip: Going slightly larger than needed is better than underestimating.
Step 3: Start Driving the Pile
Place the pile vertically on your mark.
Rotate clockwise using your wrench or hydraulic driver.
Keep steady downward pressure so the helical plate bites into the soil.
You’ll feel resistance increase as the pile goes deeper — that’s a good sign of load capacity.
Step 4: Depth Matters
In Alberta, screw piles are typically installed 6–8 feet deep to reach below the frost line. This prevents heaving during freeze-thaw cycles.
If you hit hard resistance (like large rocks), try moving the pile a few inches over.
Step 5: Check Alignment Often
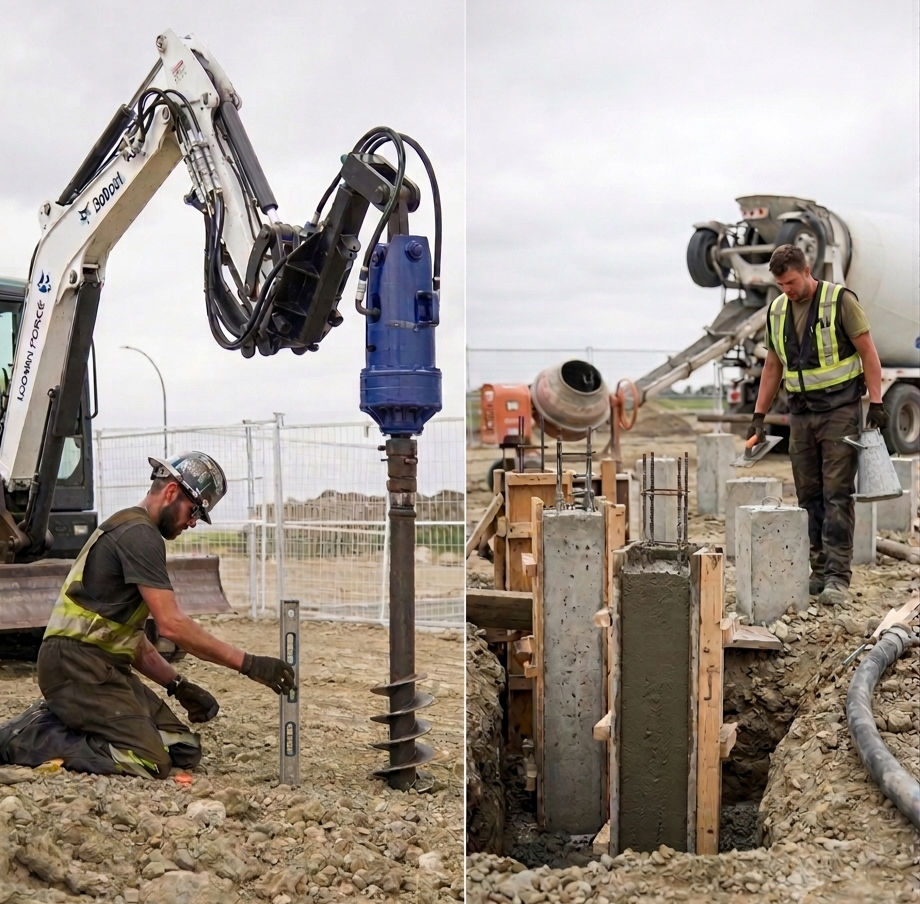
Use a level every few turns to ensure the pile stays perfectly vertical. A leaning pile can compromise stability.
Step 6: Cut and Cap
Once all piles are installed:
Trim them to the right height using an angle grinder or saw.
Attach brackets or caps to hold your beams or framing.
Common Mistakes Homeowners Make
Even though screw piles are simpler than concrete, DIY installation still has pitfalls. Here are the most common mistakes:
Not going deep enough – Stopping before reaching stable soil or below frost line leads to shifting later.
Crooked piles – Without constant leveling, piles can lean, weakening support.
Wrong size piles – Using undersized piles risks foundation failure.
Poor spacing – Irregular pile spacing causes uneven weight distribution.
Underestimating soil conditions – Rocky or clay-heavy soils may require professional equipment.
Factor | DIY Installation | Professional Installation |
Tools | Manual wrench or rental driver | Hydraulic rigs and torque monitoring |
Cost | Lower upfront (if soil is easy) | Higher upfront but guaranteed stability |
Speed | 1–2 hours per pile manually | Minutes per pile with pro equipment |
Accuracy | Depends on homeowner skill | Engineered and tested to code |
Load Testing | Not available | Verified with torque and load tests |
Best For | Fences, small sheds, light decks | Homes, garages, additions, large decks |
Essential Machinery for Screw Pile Installation
Professional screw pile installation requires specialized equipment that ensures precision, efficiency, and safety. At Down Force Piling, we operate Calgary's most advanced piling machinery to deliver flawless foundations in all soil conditions. This guide reveals the key equipment we use and why it matters for your project's success.
Core Installation Equipment
1. Hydraulic Drive Heads
Function: Provides rotational torque to install piles
Capacity: 5,000-30,000 ft-lbs of torque
Key Feature: Real-time torque monitoring verifies load capacity
Why It Matters: Ensures each pile meets engineered specifications
2. Compact Excavators
Models Used: 3-8 ton mini excavators
Attachments:
Hydraulic torque motors
Advantage: Fits in tight urban lots (as narrow as 6')
3. Support Vehicles
Pile Transport Trailers: Secure steel pile delivery
Service Trucks: Carry tools and replacement parts
Mobilization Time: Typically under 2 hours
Soil-Specific Tools
For Rocky Conditions
Hardened Helix Plates: 1" thick steel for durability
For Clay/Soft Soils
Larger helix: Prevents soil compaction
Extensions: Allows penetration to soils with required bearing
Why Equipment Matters More Than You Think
Precision - Proper machinery prevents costly off-spec installations
Safety - Certified equipment reduces worksite risks
Efficiency - Right tools mean faster project completion
Adaptability - Can handle unexpected soil conditions
Screw Pile Installation Tools: Why the Right Equipment Matters for Your Foundation
When it comes to building a deck, addition, or even a fence, the foundation is everything. Screw piles (also known as helical piles) have become incredibly popular because they are fast, clean, and incredibly stable. But as with any construction method, a successful outcome depends entirely on using the right screw pile installation tools.
Many ambitious homeowners look at the cost of professional installation and think: "I can just rent a machine and do this myself."
While you certainly can rent equipment, there is a fundamental difference between the tools available at a rental yard and the advanced technology used by specialized contractors. This isn't just about making the job easier; it’s about engineering, safety, and building code compliance.
The DIY Toolset: Handhelds and Rental Machines
For a small project like a standard-height deck (under 2ft) or a fence, DIY-grade tools can be sufficient. These typically come in two forms:
1. Handheld Installation Tools
Imagine a massive, two-person handheld auger. You and a partner hold onto the handles while a motor spins the pile into the ground.
The Good: Inexpensive and can get into tight spaces where a machine cannot fit.
The Bad: It is physically exhausting and potentially dangerous if the pile hits a rock, causing the machine to kick back. It is almost impossible to keep the pile perfectly vertical, and there is absolutely no way to measure torque.
2. Rented Mini-Excavator or Skid Steer
This is the most common "upgrade" for DIYers. You rent a small machine and attach a hydraulic drive head (often a generic auger attachment) to the front arm.
The Good: Much less physical labor and faster installation.
The Bad: This method still only tackles one part of the equation: putting the pile in the ground. It completely fails to solve the engineering requirement: proving the pile will hold.
The Pro Toolset: High-Torque Hydraulic Drive Heads and Digital Monitors
This is where the difference becomes critical. Professional piling services don't just use bigger machines; they use entirely different types of screw pile installation tools designed for precision and verification.
1. Dedicated, High-Torque Hydraulic Drive Heads
A generic rental skid steer attachment is designed for digging holes, not for driving a structural pile. Professionals use specialized, low-speed, high-torque drive heads.
The Advantage: These machines can deliver thousands of foot-pounds of rotational force, allowing them to bypass difficult soil conditions (like Alberta's hard clay) and reach the required depth below the frost line without seizing.
2. The Game-Changer: The Digital Torque Monitor
This is the single most important tool that a DIY rental never has. In professional pile installation, torque equals capacity. We must prove that a pile was installed with enough rotational force to support its intended load.
The Professional Standard: Professional installers use wireless, digital torque monitors that connect the drive head to a tablet. As the pile is driven, the software creates a real-time graph of the torque. This is used to produce a certified torque report, which is required by city inspectors and structural engineers to sign off on a project and transfer structural liability.
Key Comparison: DIY Tools vs. Professional Piling Tools
Feature | DIY (Rental/Handheld) | Professional Piling Services |
Primary Goal | Put the steel in the ground | Verify the load-bearing capacity |
Drive Head | Low-torque / Generic auger | High-torque / Specialized |
Torque Verification | None (Guesswork) | Certified Digital Torque Reports |
Frost Line Protection | Difficult to verify depth | Fully documented depth & torque |
Code Compliance | Unlikely for structural loads | Engineered & Inspector-Approved |
Structure Type | Fences, non-structural decks | Houses, additions, major structures |
Bypassing Obstructions and Reaching Stable Soil
What happens when your rented machine hits a large boulder or a dense lens of hard clay at 4 feet?
DIY: The generic rental drive head stalls out. The homeowner is stuck: the pile is too shallow (above the frost line) but won't go any deeper. This often leads to cutting the pile short, creating a foundation destined to fail.
Professional: We deploy high-torque machinery specifically designed to bypass or even cut through many obstructions. Our operators have the power and the real-time data to know when they've reached stable soil capable of supporting your building.
Bypassing Obstructions and Reaching Stable Soil
What happens when your rented machine hits a large boulder or a dense lens of hard clay at 4 feet?
DIY: The generic rental drive head stalls out. The homeowner is stuck: the pile is too shallow (above the frost line) but won't go any deeper. This often leads to cutting the pile short, creating a foundation destined to fail.
Professional: We deploy high-torque machinery specifically designed to bypass or even cut through many obstructions. Our operators have the power and the real-time data to know when they've reached stable soil capable of supporting your building.
The Efficient Process of Screw Pile Installation
Screw pile installation is designed to be quick, efficient, and minimally disruptive, providing a solid foundation with advanced equipment and expertise.
Site Preparation and Layout: Before any piles go into the ground, the project site is carefully marked out. This includes defining the perimeter of the structure and precisely locating each pile. A rotary laser level is used to set the exact height of the pile saddles, which ensures fast and accurate beam installation later on. Little to no ground preparation is typically required, minimizing disturbed earth.
Equipment and Assembly: Screw piles are installed using specialized equipment, often a hydraulic drive head mounted on a skid steer loader, excavator, or backhoe. For smaller projects, a grass track mini Kubota excavator with a custom auger attachment can be used. The drive head, sometimes called an auger, is powered by the excavator's boom. A "bale piece" connects the drive head to the boom, suitable for new construction or underpinning, allowing the pile to go straight down. Other attachments like a "yoke" are used for tie-backs in shoring jobs, such as for seawalls or highways, drilling at an angle.
Beginning the Installation (Lead Section): The helical pile, which looks like a large screw or auger but is fundamentally different as it doesn't cause spoils or vibrations, is inserted into the boom. The excavator operator applies downward "crowd pressure" while the pile begins to rotate. It's crucial for the ground crew to assist the operator in keeping the installation plumb (straight up and down), especially during the installation of the lead section and the first plain extension. This ensures proper alignment and effectiveness.
Extending the Pile to Depth: After the lead section is installed, plain extensions are added to reach the appropriate depth. Extensions with additional helical plates are also available if more torque and, consequently, more load capacity are needed. The connection between pieces is a forged male-female connection secured with a single through-bolt. A 12-inch or larger crescent wrench is used to tighten these bolts, and connections should be double-checked for positive engagement.
Monitoring Installation Torque (The Key to Capacity): Accurately measuring the installation torque is the single most important aspect of the process. The installation torque has a direct relationship to the pile's load capacity, similar to how driving force relates to a driven pile. Modern devices, such as the CHANCE® digital torque indicator, directly measure torque using strain gauges, eliminating the accuracy problems of older methods that estimated torque from hydraulic pressure. These devices are durable, have no moving parts, and allow contractors to read the exact foot-pounds of torque at every step, which engineers highly value. For square shaft material, a KT value of 10 means 1,000 foot-pounds of torque is equivalent to 10 Kips (10,000 pounds) of capacity. For example, a 1.0 reading on the indicator can mean 1,000 foot-pounds of torque, equating to 10 Kips for that material.
Optimal Installation Speed: Helical piles should be installed at operating speeds between 8 and 16 RPMs. Installing them faster can "auger" a hole, which negatively impacts the pile's load capacity. The pitch on each helical plate is 3 inches, so if the pile is advancing correctly, it should advance approximately 3 inches per revolution.
Addressing Challenges: If a pile is "spinning out" (not advancing properly, like stripping a screw), the solution typically involves applying more crowd pressure or adding more and/or larger helical plates to generate increased downward thrust. It's also normal to see a permanent twist or wrap in the steel shaft when approaching the maximum torque capacity of the material, which serves as a good visual indicator of installation torque without damaging the shaft. However, it is not recommended to exceed the maximum torque capacity, as this can cause a clean break below ground.
Completing the Foundation: Once the required torque and depth are achieved, the installation is complete. The pile cap assembly, consisting of a threaded rod, a saddle, and an adjustment nut, sits on top of the pile. This pile cap can be easily adjusted by twisting the saddle or adjusting the nut, ensuring a level and ready-to-build foundation.
Advantages of Screw Piles for Calgary Projects
Screw piles offer numerous benefits that make them an excellent choice for a wide range of applications in Calgary:
Speed and Efficiency: Screw piles are relatively quick to install and require little or no ground preparation, leading to minimal disruption on site. For example, Down Force Piling and Supply highlights their efficient and reliable process, ensuring solid foundations quickly.
Superior Reliability and Durability: Originally designed for lighthouses in the 1800s to prevent them from falling into the ocean, this technology has proven its longevity, with some of the oldest lighthouses still standing on similar foundations. One professional reported zero failures in 40 years of installing these foundations, often exceeding city inspection requirements.
High Load Capacity: Screw piles can achieve significant load capacities. For instance, an inch and three-quarter square shaft material can be good for 10,500 foot-pounds, equating to 100 Kips or 100,000 pounds.
Environmental Friendliness: Unlike augers that drill holes and cause spoils (excavated earth), screw piles work like a screw into wood, creating no spoils and no vibrations. This minimal disturbance to the ground is a significant environmental advantage.
Versatility: Screw piles are suitable for various applications, including new construction, foundation lifts, underpinning existing structures, and even tie-back anchors for shoring jobs like seawalls and highways.
Engineered for Success in Calgary: Companies like Down Force Piling and Supply, a trusted, family-owned business in Calgary, engineer all jobs to ensure the correct pile size for each project, with this design work included in the pile price. They also offer on-site custom welding to meet unique project requirements.
Proven Trust: Down Force Piling and Supply is trusted by Calgary's top home builders, showcasing their reputation for quality and service within the local community. They also demonstrate commitment to the local community through their 4-C's program, donating 1% of revenue from core clients to charities.
Adaptability to Soil Conditions: The installation process accounts for varying soil conditions, from softer to very dense soils like caliche. The ability to monitor torque in real-time ensures the pile reaches adequate bearing capacity even in challenging ground.
When to Call a Professional
DIY is fine for light projects — but once you’re building something bigger than a fence or small shed, professional installation is the safest choice.
Reasons to hire pros like Down Force Piling:
Specialized hydraulic equipment ensures piles go deep and straight.
Torque monitoring confirms each pile’s load capacity.
Installations are engineered to meet Alberta’s building codes.
Large projects are finished in hours instead of days.
If you’re in Alberta and want guaranteed results, contact Down Force Piling for a free quote. We’ve installed thousands of screw piles across Calgary and beyond, from small backyards to large commercial projects.
FAQs About Screw Piles
How long do screw piles last?
Galvanized piles can last 50+ years, even in harsh soil conditions.
Can I install screw piles in winter?
Yes, unlike concrete, screw piles can be installed in frozen ground.
Do screw piles need maintenance?
No regular maintenance is required.
Can screw piles hold heavy structures?
Absolutely. When engineered correctly, they can support houses, garages, and even bridges.
Now you know how to install screw piles at home: plan your layout, pick the right size, screw them in deep and straight, and attach your brackets. For small projects like fences and sheds, it’s a manageable DIY task.
But for bigger projects — decks, garages, or additions — professional installation is the way to go. With certified equipment, torque monitoring, and years of experience, Down Force Piling ensures your foundation is rock-solid and code-compliant.
Ready to build on a foundation that lasts? Contact Down Force Piling in Alberta today for a free quote. Build stronger. Build smarter. Build with screw piles.